Kenyan ID quick checklist
Nine steps, the documents to prepare, Brian Harris & Co and links to the Kenya High Commission.
This is the short version of my first Kenyan ID application from the UK, from preparing the paperwork to receiving the card. Some documents depend on your citizenship history; check the linked High Commission instructions for your circumstances.
Read my full account of the application.
Step 1: Confirm your citizenship route
If you hold another citizenship, check whether you need to declare dual citizenship (opens in a new tab) or regain Kenyan citizenship (opens in a new tab). Unsure? Ask the High Commission (opens in a new tab) before preparing or paying for an application. I used the declaration route; another person’s route may differ.
Step 2: Fill in the declaration, if needed
Use the form on the declaration page (opens in a new tab). Fill in your details and contact information, including your postal address, phone and email. Leave your signature blank. Prepare the supporting copies listed there:
- Birth certificate.
- Kenyan and foreign passport identity pages.
- Foreign registration or naturalisation certificate.
- UK residence permit or visa, where applicable; confirm what applies if you are British.
- Name-change evidence, if applicable.
- Two passport photographs.
The form specifies duplicate completion: confirm whether two separately witnessed originals are needed. For two applications, check the photos and copies needed for each.
Step 3: Get the declaration witnessed
I used Brian Harris & Co in London (opens in a new tab) to witness my declaration. Contact the firm to confirm it can handle your form, arrange the visit and check identification, required copies and the current fee.
Take the completed but unsigned declaration. Sign it in front of the solicitor, then have it witnessed and stamped. Leave the witness’s section for the solicitor. Keep a scan or copy for your own records; that does not replace required originals.
This is the firm I used. The High Commission also lists other qualifying witnesses on its declaration page.
Step 4: Confirm how to submit the declaration
The published declaration instructions (opens in a new tab) say to submit by post. Follow its document and payment instructions unless the High Commission confirms another arrangement. Check this fee separately from the solicitor’s fee and ID fee.
My experience: I handed the witnessed declaration over at my ID appointment; I did not post it separately. Confirm whether this is accepted now before planning the same route, and ask what acknowledgement or proof you need for the ID.
Step 5: Complete the ID form and gather the documents
Use the first-application ID checklist (opens in a new tab):
- Completed ID form. The page names both Reg. 136A and 136C; confirm the version.
- Kenyan birth certificate copy; I also took the original.
- Two recent passport photographs on a white background.
- Kenyan passport identity-page copy.
- Parent or parents’ ID copies; I copied both sides of both parents’ IDs.
- Kenyan citizenship registration certificate copy, if applicable.
- Copies of applicable UK residence or foreign citizenship evidence, plus declaration/regaining proof for dual citizens. Mine included my British registration certificate copy.
- Original first-generation ID, if held.
I also took my current passport and a copy, the signed declaration under my appointment arrangement, and these older records:
- Both sides of the relevant page in my mother’s Kenyan passport showing my childhood endorsement.
- A copy of older entry or residence evidence recorded in a passport.
If your history is similar, ask what evidence is accepted; these older records describe my case. Confirm originals and any translation requirements with the High Commission. Keep originals and copies organised separately.
Step 6: Buy and address the return envelope
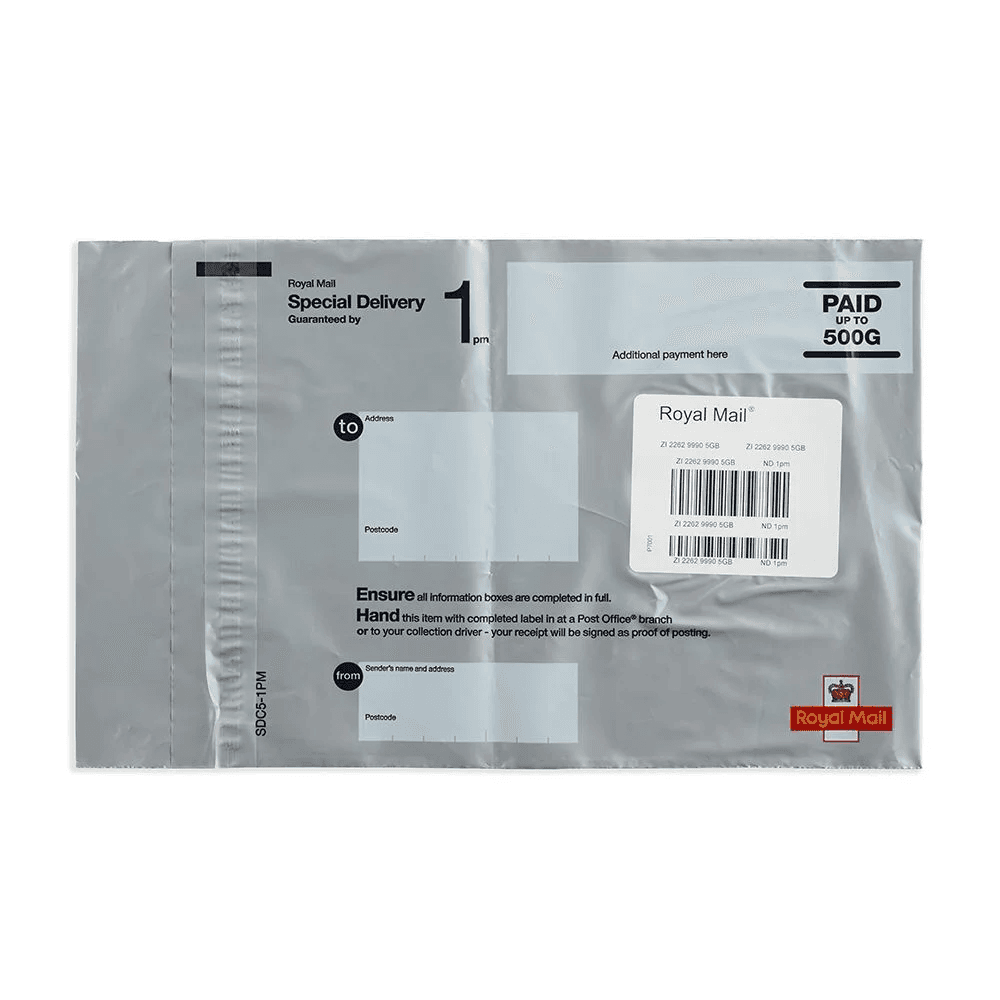
Get a prepaid, registered, trackable return envelope with sufficient postage. I bought a Royal Mail Special Delivery envelope for up to 500g. Check the weight needed for your contents at a Post Office branch (opens in a new tab).
Write your own name, full home address and postcode in the destination panel. Take it with your application papers.
See the prepaid return-envelope example
Step 7: Book the ID appointment
Use the High Commission’s appointment portal (opens in a new tab). Enter an email you can access, follow its verification link and book the ID visit. Keep the booking confirmation and recheck documents, location, current fee and payment method before travelling.
Step 8: Attend, submit the papers and pay
Bring the form, documents, photographs and return envelope. Attend in person for fingerprints. Hand over the declaration only under the arrangement confirmed in step 4. Pay the ID fee using the method on the ID page (opens in a new tab).
Staff may ask for corrections or more paperwork: I had to fill in the ID form again. Keep receipts and references, and ask how to follow up.
Step 9: Receive and check the return
IDs are returned by post. Mine arrived with returned documents and declaration paperwork in the same envelope; delivery arrangements and timing can differ. Check the returned papers, retain them securely and distinguish an acknowledgement from confirmation of an outcome. For missing documents or a delivery query, contact the High Commission (opens in a new tab).
Original sources
ID, declaration, booking and witnessing pages checked on 4 October 2026. Recheck before applying: